Apart from that, there are some developer tools that give more granular controls to the developers. Likewise, apps using the nearby devices feature might no longer need your device’s location permission. With that said, this build is still in the testing phase and hence stability issues might be imminent. However, if you still wish to give it a try and test out all the intriguing features of this new OS build, then this guide shall help you out. In this tutorial, we will show you the steps to install Android 13 onto your device via ADB Sideload.
Benefits and Drawback of Installing Android 13 via ADB Sideload
This method has its fair share of perks and caveats. The biggest advantage of ADB Sideload is that you could easily update your device to Android 13 on a locked bootloader. But on the downside, you wouldn’t be able to downgrade to Android 12 using this method. This is because ADB Sideload doesn’t support downgrading. So if you ever wish to revert to Android 12, you will have to use the Fastboot Method or Android Flash Tool, both of which require an unlocked bootloader. As far as the supported device list is concerned, you could install the Android 13 either via ADB Sideload on the following devices: Google Pixel 4, Pixel 4 XL, Pixel 4a, Pixel 4a 5G, Pixel 5, Pixel 5a, Pixel 6, and Pixel 6 Pro. In this regard, do keep in mind that the Developer Preview builds are highly unstable, and it isn’t recommended to use it as your daily driver in its current state. Moreover, you should take a backup of all the data on your device beforehand.
Android 13 Screenshots
Here are some of the screenshots that I took of some important device pages, namely- Settings menu, Quick Settings toggle, System page, Notification Area, and the revamped WiFi network selection screen. Do note that these images are from the First Developer Preview, and there could be quite a few changes by the time it reaches the stable build. So please don’t mold your installation decision based on just these screenshots.
How to Install Android 13 via ADB Sideload
The below instructions are listed under separate sections for ease of understanding. Make sure to follow in the exact same sequence as mentioned. Droidwin and its members wouldn’t be held responsible in case of a thermonuclear war, your alarm doesn’t wake you up, or if anything happens to your device and data by performing the below steps.
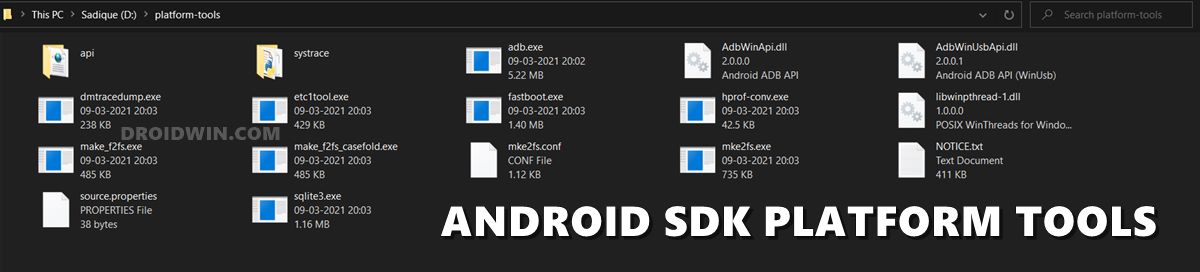
STEP 1: Install Android SDK
First and foremost, you will have to install the Android SDK Platform Tools on your PC. This is the official ADB and Fastboot binary provided by Google and is the only recommended one. So download it and then extract it to any convenient location on your PC. Doing so will give you the platform-tools folder, which will be used throughout this guide.
STEP 2: Download Android 13 OTA Image
You may now download the Android 13 firmware corresponding to your device from here. Since we are using the ADB Sideload method, you should download the OTA file (and not the Factory Image). Moreover, once you have downloaded the firmware, transfer it to the platform-tools folder on your PC. Likewise, rename the file to update, so that the complete name becomes update.zip. [We have done this rename as it will be easy to type in the Command Prompt].
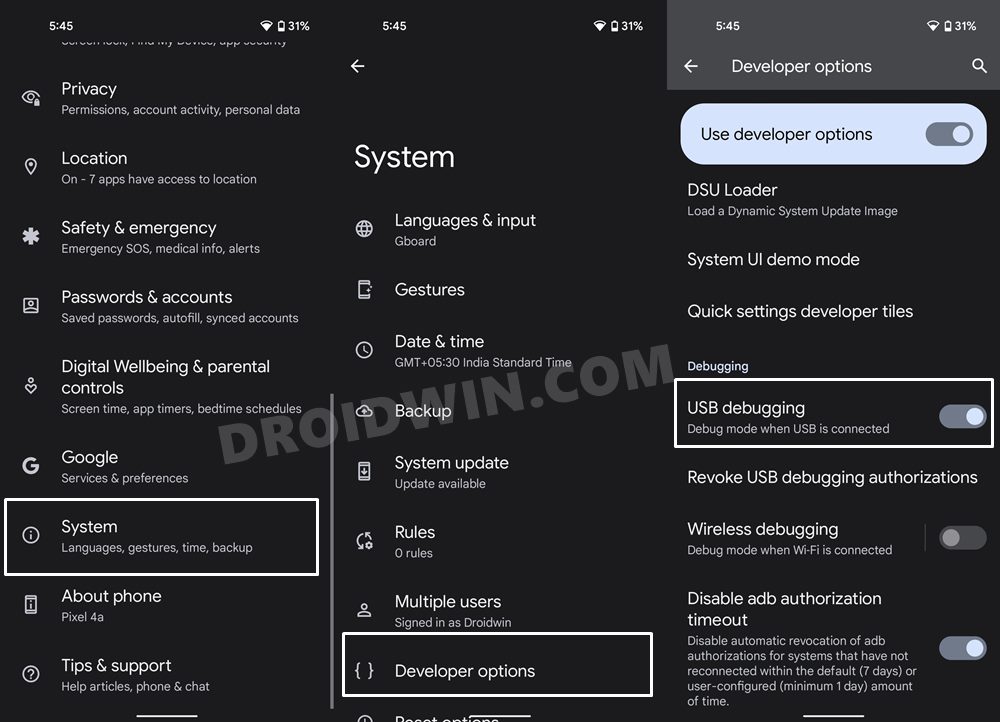
STEP 3: Enable USB Debugging
Next up, you will have to enable USB Debugging so that your device is recognizable by the PC in ADB mode. This will then allow you to boot your device to Recovery Mode. So head over to Settings > About Phone > Tap on Build Number 7 times > Go back to Settings > System > Advanced > Developer Options > Enable USB Debugging.
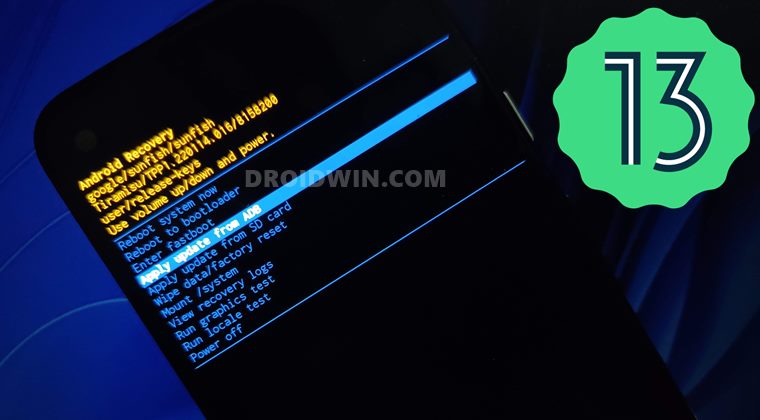
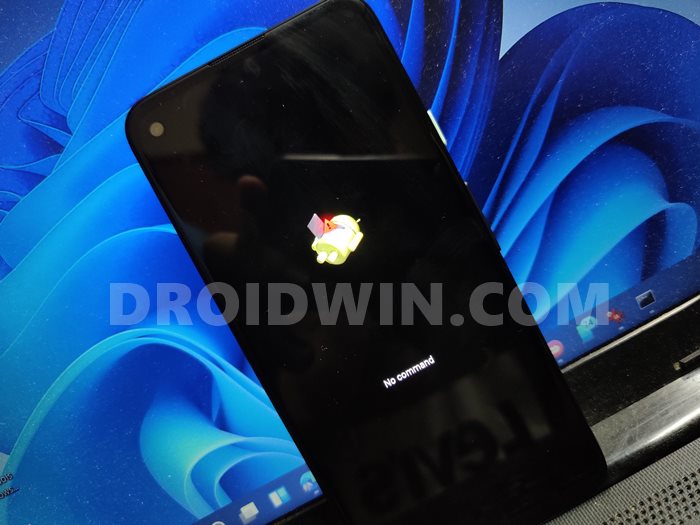
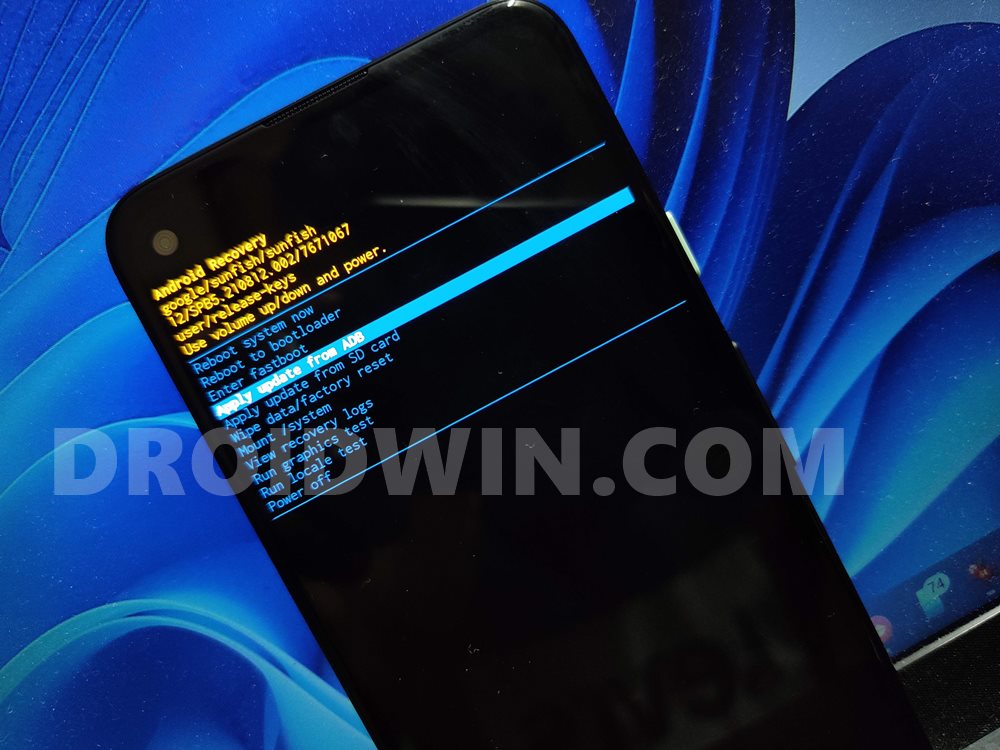
STEP 4: Boot to Stock Recovery
STEP 5: Install Android 13 Via ADB Sideload
That’s it. These were the steps to install Android 13 onto your device via ADB Sideload. If you have any queries concerning the aforementioned steps, do let us know in the comments. We will get back to you with a solution at the earliest.
How to Install Android 13 GSI on any Project Treble DeviceHow to Install Android 13 via Android Flash ToolHow to Install Android 13 via Fastboot MethodInstall Custom ROM on Android via ADB SideloadHow to Use ADB Sideload in Android [Stock and TWRP Recovery]ADB Sideload not working: Cannot Read File [Fixed]
About Chief Editor