Silicon Valley giants have just raised the curtains from its latest OS offering. Android 11 is already live for Pixel devices whereas other OEMs are climbing this ladder as well. This straightway translates to that you are about to welcome a plethora of new features. These include a new conversation section in the notification panel and the ability to prioritize notifications from a particular sender. Likewise, there is new one-time permission, a native screen recorder, chat bubbles, and the ability to schedule dark mode. Well, there are a plentitude of other changes and this list could go on and on. Then to further exploit the device’s full potential, you could step into the custom development scene. Once you have the bootloader unlocked, you have opened the gates to the plethora of customizations. These include the flashing of custom ROMs, custom recoveries like TWRP and Lineage and even gain access to the system partition. The latter, in simpler terms, is also known as rooting the device. Now there are two different approaches to root your device: with TWRP or without TWRP. The first method is rather simple- just flash the Magisk Installer ZIP via TWRP. On the other hand, the latter method calls for a lot of efforts, as mentioned in the introductory paragraph, you will have to get the stock boot.img file, patch it via Magisk, and flash it via Fastboot commands. So one obvious question that some of you might ask is why to take the ‘road less traveled’? Well, the thing is not every device has a working TWRP. Furthermore, the relationship is quite complicated as of now between Android 11 and TWRP. So the road ahead looks patchy as of now. Hence rooting an Android 11 device via Magisk Patched boot.img (without TWRP) seems to the only road forward. And in this tutorial, we will ‘guide’ you to this path only. So fasten on the seatbelts and get ready to step into the uncharted territory ahead!
How to Update Magisk ZIP and Magisk Manager (without TWRP)Fix Magisk Module Bootloop without TWRP Recovery[Update: Added Magisk 21] Everything About Magisk- Manager, Modules and MoreHow to Fix TWRP Error 20 GApps after flashing LineageOS
How to Root Android 11 via Magisk Patched boot.img (without TWRP)
The below instructions are distributed into separate sections for ease of understanding. Please follow the exact same sequence as mentioned.
STEP 1: Backup All Data
While rooting doesn’t wipe off data, but its prerequisites do. That is, when you unlock the device bootloader, all the data will be wiped off. SO take a backup beforehand. Even if you have unlocked the bootloader before and just wish to root your Android 11 device, we would still suggest taking a complete backup beforehand, just to be on the safer side.
STEP 2: Enable USB Debugging and OEM Unlocking
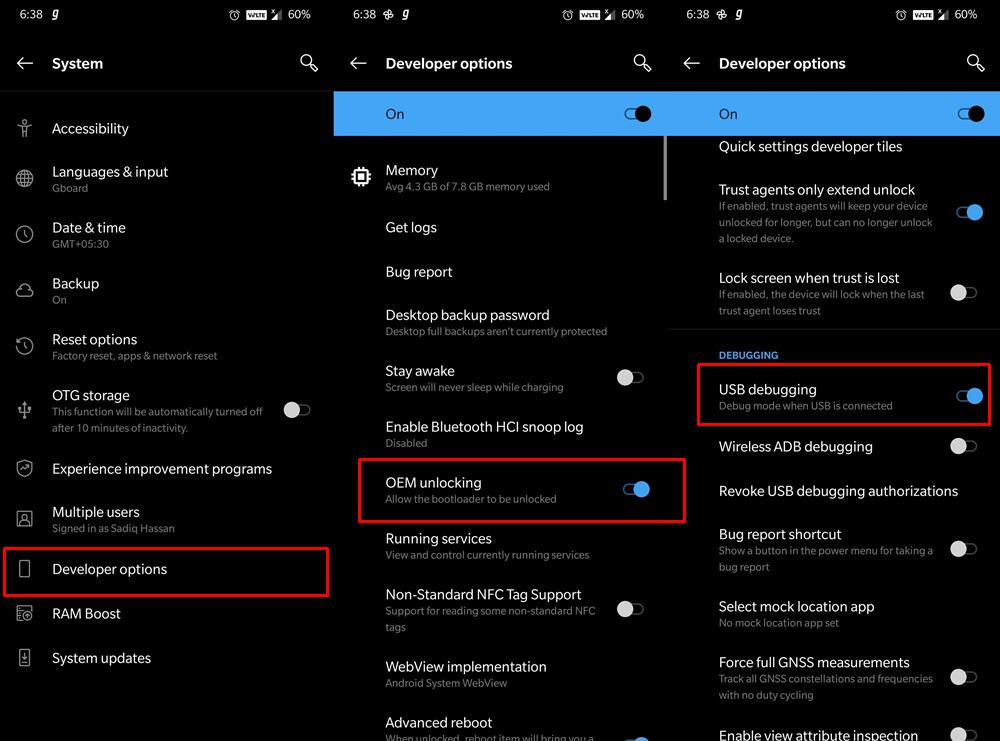
Next up, you will have to enable USB Debugging and OEM Unlocking. The first makes it possible for the device to be recognized by the PC in ADB Mode. This will in turn allow you to execute ADB Commands. But why would you need ADB Commands as of now? Well, it would be needed to boot your device to Fastboot Mode. The Fastboot mode will be used twice- once to unlock the bootloader and the second time to flash the magisk patched boot.img file (that will then be used to root your Android 11 device). On the other hand, OEM Unlocking is needed to allow for the Unlocking process. So head over to Settings > About Phone > Tap on Build Number 7 times > Go back to Settings > System > Advanced > Developer Options > Enable USB Debugging and OEM Unlocking.
STEP 3: Install Android SDK Platform Tools
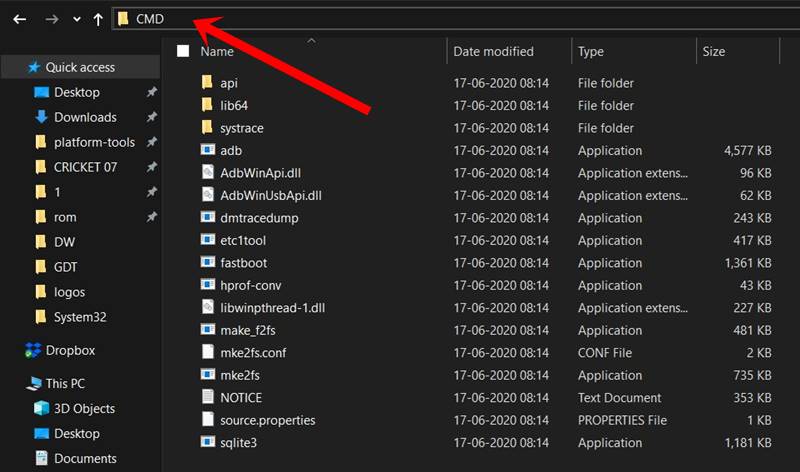
You will now have to install the Android SDK Platform Tools on your PC. This will provide us with all the necessary ADB and Fastboot binaries. Do keep in mind that there are already a plethora of tools for the same, but we would suggest you keep a safe distance from all of them and only stick with this offering from Google.
Fix error boot prepare- device stuck in fastbootFix Android stuck in Recovery Mode: No Command screenDetailed Steps to Fix adb is not recognized ErrorHow to Fix FAILED (remote: unknown command) Error
STEP 4: Unlock Bootloader on Android 11
We are now slowly but surely reaching our destination to root your Android 11 device via Magisk Patched boot.img (without TWRP). The first step towards the same is to unlock the device bootloader. We would like to highlight a few risks associated with this process. First and foremost, it might make the device warranty null and void. Furthermore, you will also lose all the data on your device. Likewise, apps like Google Pay, Netflix (WideVine L1 degradation to L3), and Pokemon Go might not function as expected. While the latter two issues could be fixed, there is no workaround for the warranty, unlocking the bootloader will nullify the device’s warranty. If that is well and good, then here are the steps to unlock the device’s bootloader: With this, you have successfully unlocked the bootloader on your device. It’s now time to get hold of the stock boot.img file, patch it via Magisk, and flash it via Fastboot to root your Android 11 device.
STEP 5: Download Stock Firmware for your Android 11 device
You will now have to download the stock ROM or firmware for your device. You could download the same from the respective OEM’s Download or Support section (some links: Google, OnePlus). There is one thing to keep in mind before downloading the file. You should only download the firmware that is currently installed on your device. This is because we would be using the stock boot.img file from this downloaded firmware only. If you patch and flash boot.img file older or newer than the current OS installed on your device, then your device will end up in a bootloop or soft brick (or in rare cases, hard brick as well). So head over to the Settings page on your device and look at the About Phone section. There you should see the current installed OS version, download that same build from the company’s website and proceed to the next step to extract the stock boot.img file, patch it via Magisk, and flash it via Fastboot to root your Android 11 device.
Fix Magisk patched boot.img issue while Rooting Android 11Fix: pip is not recognized as an internal or external commandHow to Update Magisk ZIP and Magisk Manager (without TWRP)Fix Magisk Module Bootloop without TWRP Recovery
STEP 6: Extract Android 11 Stock Boot.img
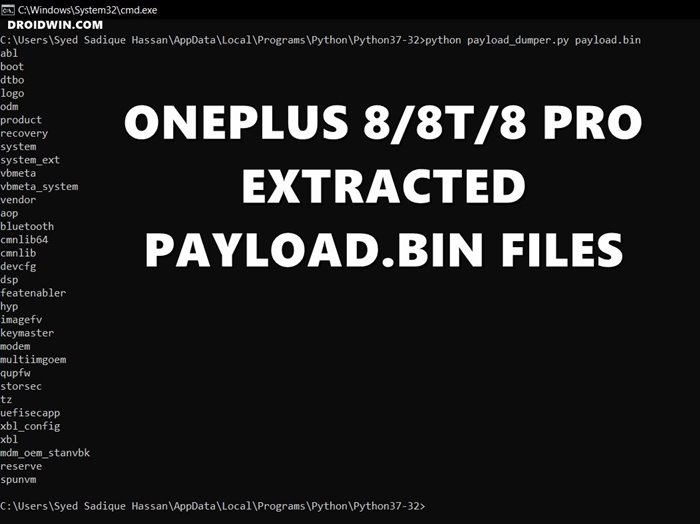
Now comes the challenging part. Most of the OEM uploads their firmware in a ZIP format or JAR(which could easily be renamed to ZIP and extracted, yes changing the extension doesn’t do any harm in this case). All well and good up to this point. But once you extract the stock firmware, you wouldn’t directly get the partition IMG files.
For example, OnePlus packs in all such files inside payload.bin, Realme, and Oppo in OZIP and so on. True to my knowledge, Google still follows the normal ZIP method, hence if you have a Pixel device, you could directly get hold of the stock boot.img file. For other devices, the following guides will come in useful:
How to Extract OZIP Realme and Oppo Stock ROM (Firmware)How to Extract Stock Boot.img from OnePlus OxygenOS Stock ROM
STEP 7: Patch Stock Boot.img file via Magisk on Android 11
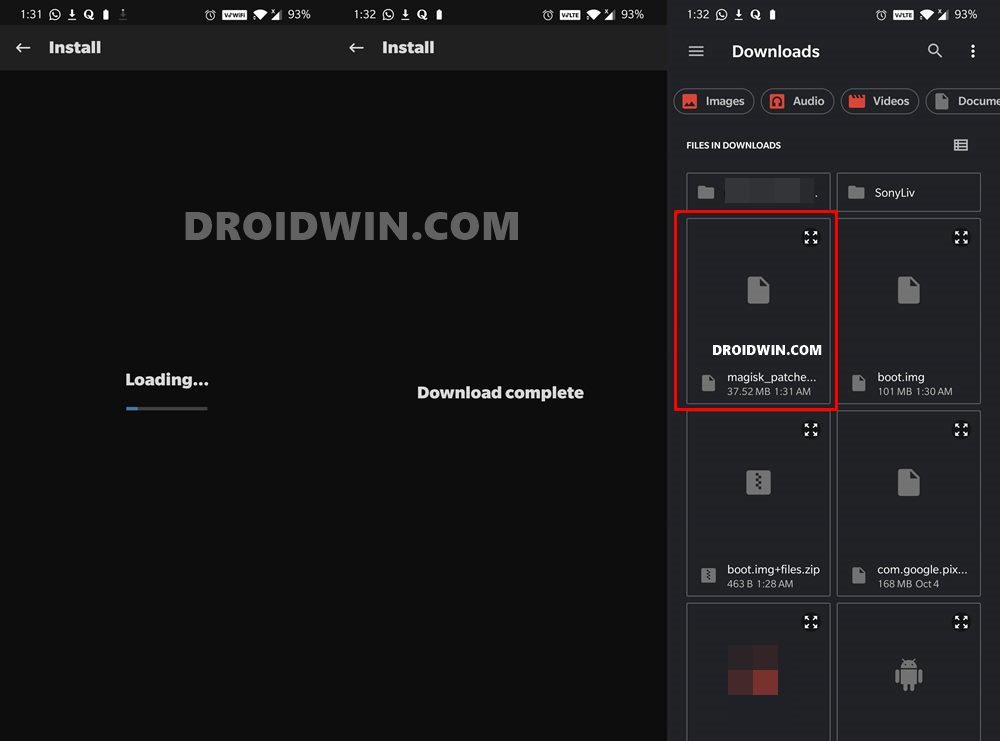
You will now have to install the Magisk Manager APK on your device. At the time of writing, the stable version is causing a few issues while patching the boot.img file. So as of now, you will have to download the Canary build of Magisk Manager and then switch the update Channel to Canary from within the app itself. You may also refer to our guide for a much detailed explanation on this: Fix Magisk patched boot.img issue while Rooting Android 11. Once that is done, it’s time to patch the stock boot.img file via Magisk. You may either refer to the below steps or check out our comprehensive coverage on the same topic: Patch Stock Boot Image via Magisk and Flash it using Fastboot
Fix error boot prepare- device stuck in fastbootFix Android stuck in Recovery Mode: No Command screenDetailed Steps to Fix adb is not recognized ErrorFix: pip is not recognized as an internal or external command
STEP 8: Root Android 11 by Flashing Magisk Patched Boot.img File
Finally, it’s now time to root the device. For this, you will have to flash this magisk_patched.img file via Fastboot Commands. And this requires you to boot the device to the Fastboot Mode. Here are the instructions for the same. For detailed instructions on the said topic, you may refer to our guide: How to Flash magisk_patched bot.img file via Fastboot. That’s it. This was our comprehensive guide on how to root Android 11 via Magisk Patched boot.img (without TWRP). I have explained all the instructions in depth. However, if you have any queries concerning the aforementioned steps, do let me know in the comments section. I will get back to you with a solution at the earliest.
[GUIDE] Flash ROMs/Magisk/TWRP/Kernels on A/B Partition DevicesEverything About Magisk- Manager, Modules and MoreBest Magisk Modules of 2020 [PART-1]Fix Magisk Module Bootloop without TWRP Recovery
About Chief Editor
![]()